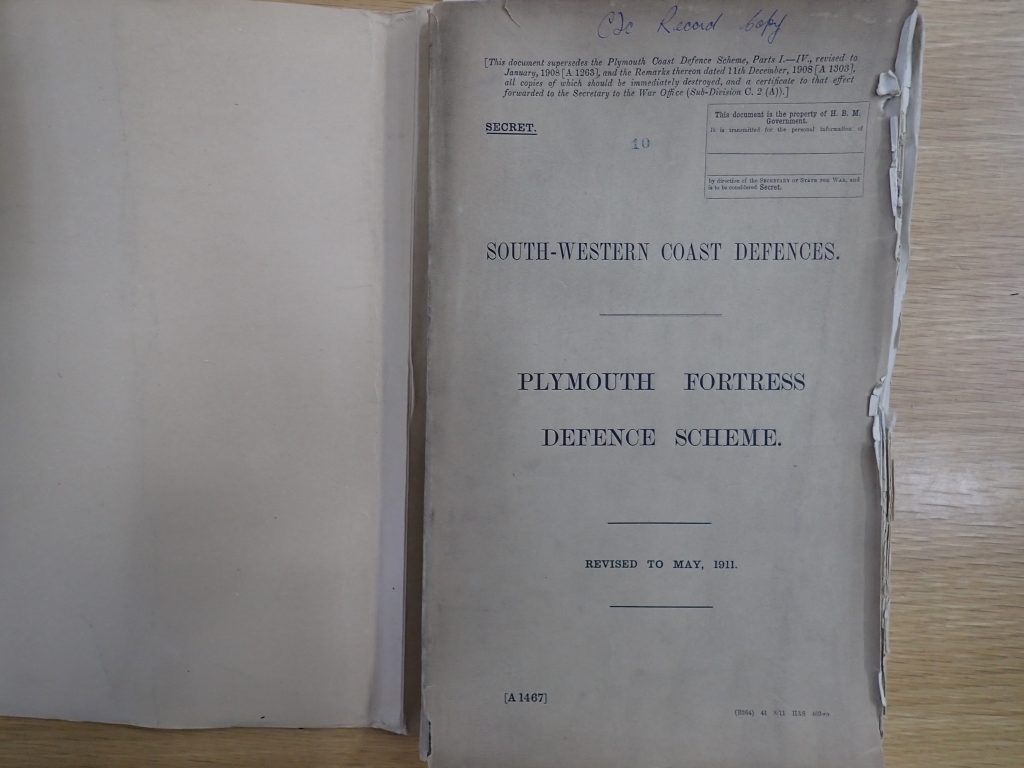
The Plymouth Defence Scheme was a secret military document only to be enacted on orders from the War Office – the then Ministry of Defence. It was the plan for the reinforcement needed to defend Plymouth and the naval base at Devonport by regular troops and by mobilising the territorial forces. The Scheme was designed to reinforce the Plymouth defences so they could contain and defeat both seaborne and land attacks. It included all the detail from stores needed to house and provision the forces, build any temporary structures, issue and resupply ammunition, food and other materiel through to the movement timetable which included train, ferry and vehicle schedules. It also detailed the communications plan and what support would be requisitioned and available from the local civilian economy and firms. The first scheme was written in 1906 just as the new breech loading guns were being deployed to the various forts around Plymouth and the Sound. It was updated in 1908 and replaced in 1911, only 3 years before the start of World War I to take account of new command structures that had been developed and changes to the Territorial Force. The Scheme was the document used for the mobilisation of forces for the Plymouth area at the start of World War I.
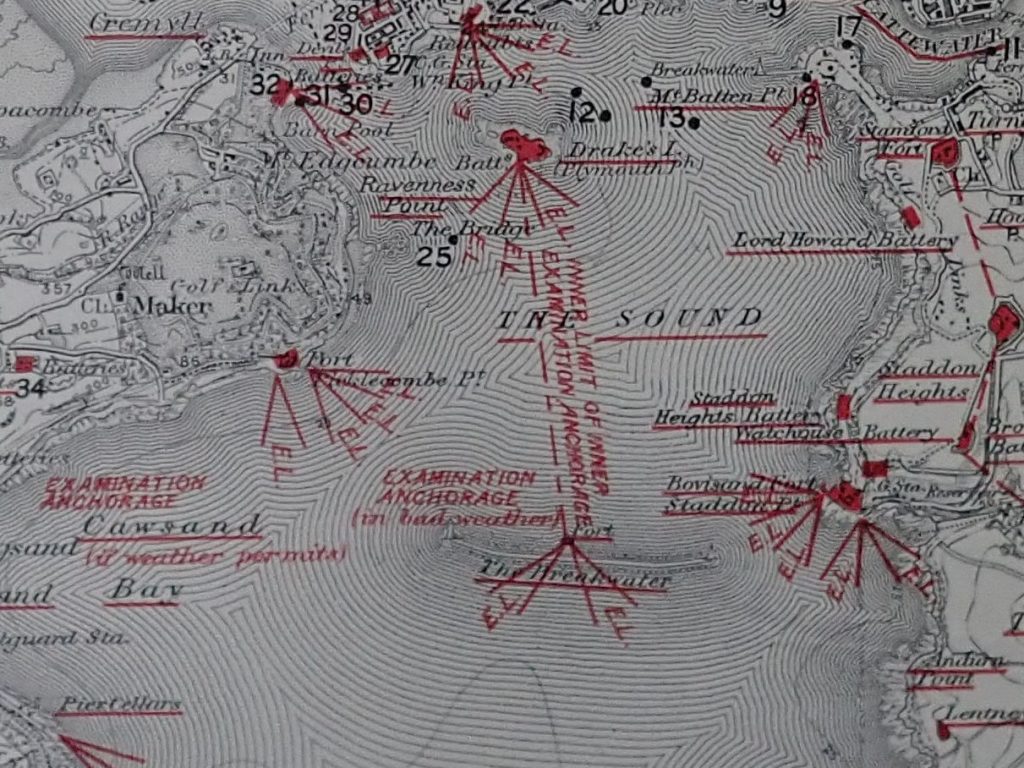
Older plans had the outer line of sea defence as Fort Bovisand, the Breakwater Fort and Fort Picklecombe. The inner line starting with Drake’s Island and the land defence with a line of Palmerston Forts to the north of Plymouth together with Eastern or Staddon and Western lines. Because of advances in technology which meant new defence positions for Port War Signal Stations (PWSS), Position Finding (PF) Cells and some additional gun batteries this now changed to Eastern, Western and Northern Sections. The change was also facilitated by quicker and more reliable communications that weren’t available at the end of the Palmerston Fort building programme. All three had peacetime HQ’s based at the Citadel and small regular forces to maintain the defence positions, guns, searchlights and equipment, Exercises to provide both training and test parts of the mobilisation plan were usually held annually as the territorial forces held their summer camps. These would build from gun training through live fire training at target buoys in the Sound and onto full scale exercises using blank ammunition defending Plymouth and Devonport from attacks and landings with the Royal Navy and regular troops providing the enemy.
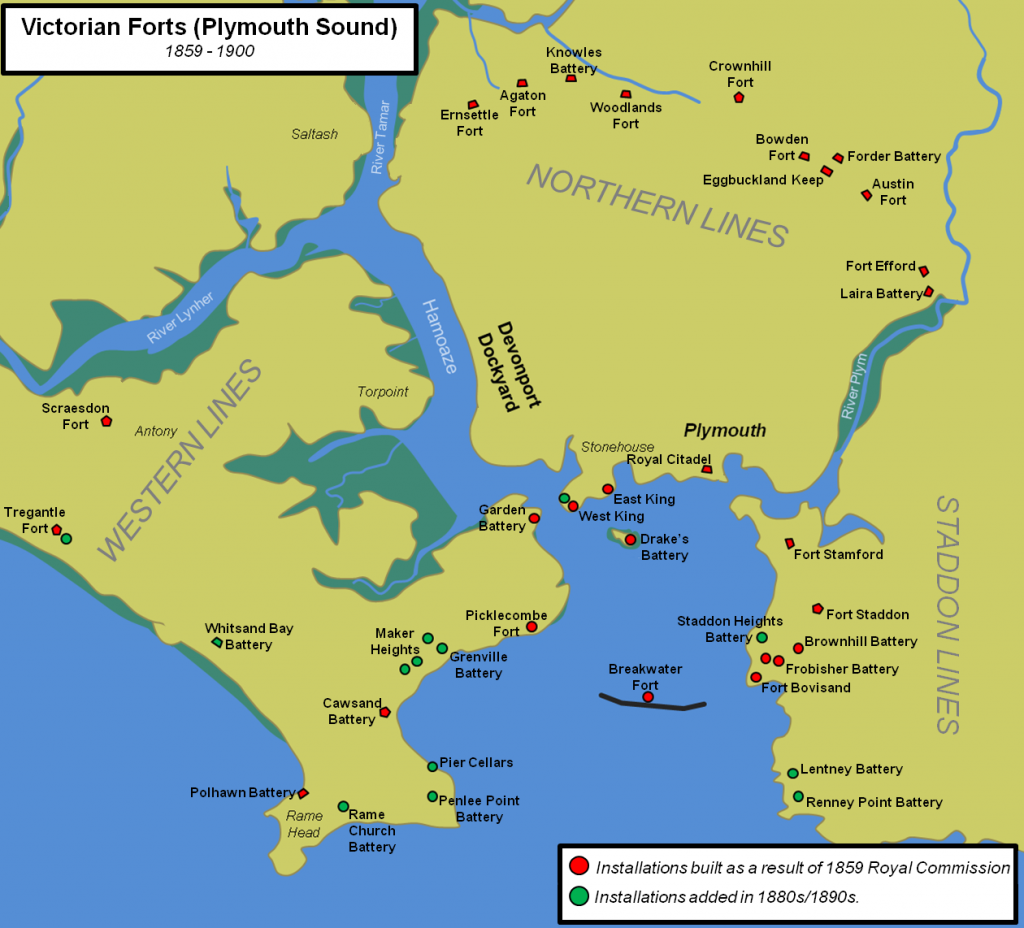
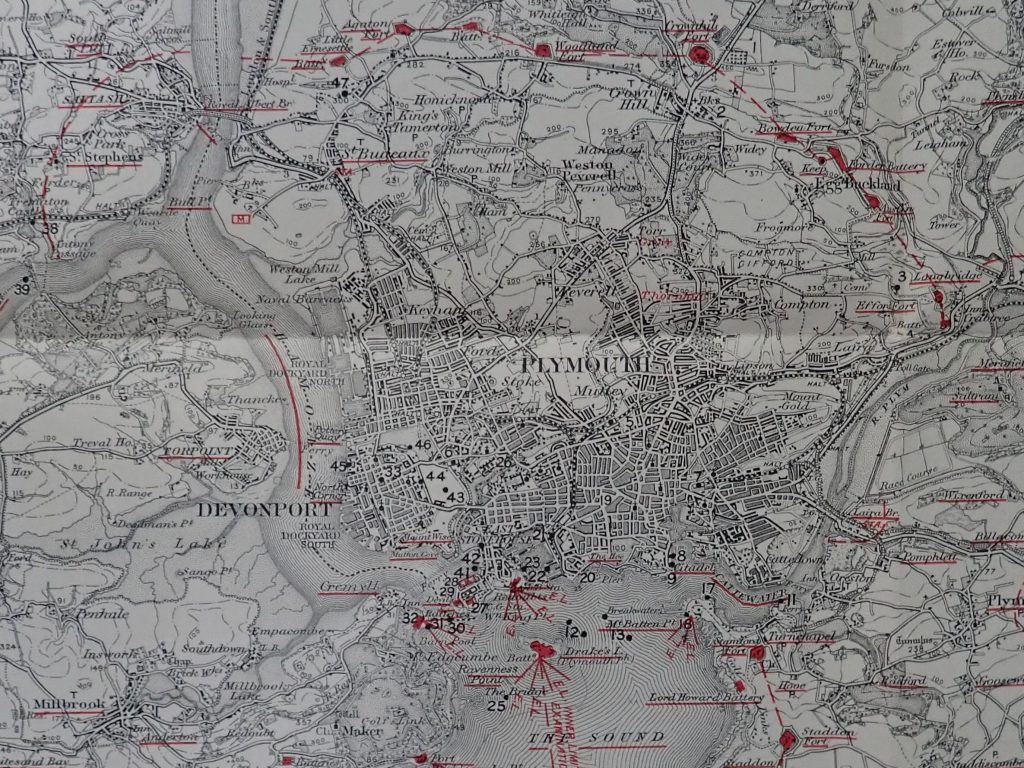
The Northern Section was essentially the land defence. It had responsibility from the Cattewater to Lynher River which meant the defence of Plymouth, the Devonport Dockyard, the Plym and Saltash from attacks by land based forces who had landed on or nearby their area of responsibility. The HQ for this section both at peacetime and at war was the Citadel. They would have forces at the main forts at Eggbuckland Keep and the associated Forder and Bowden Batteries, Crownhill Fort, Fort Austin, Agaton Fort, Fort Ernsettle, Woodlands Fort and North Raglan Barracks. There would also be detachments at key points throughout their area of responsibility including Millbay Docks, Bull Point Magazine and the Saltash Bridge and ferry amongst others. There were no coast gun batteries under Northern section command although they had responsibility to defend the coast batteries within their area of responsibility from land based attacks or from landings by enemy forces.
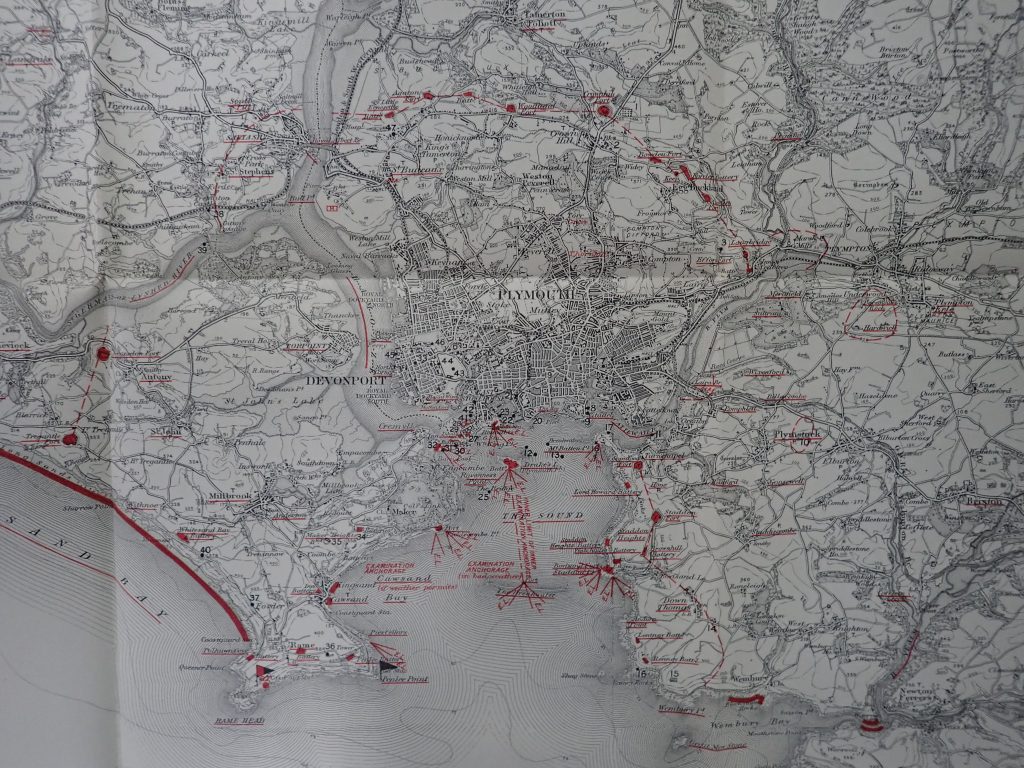
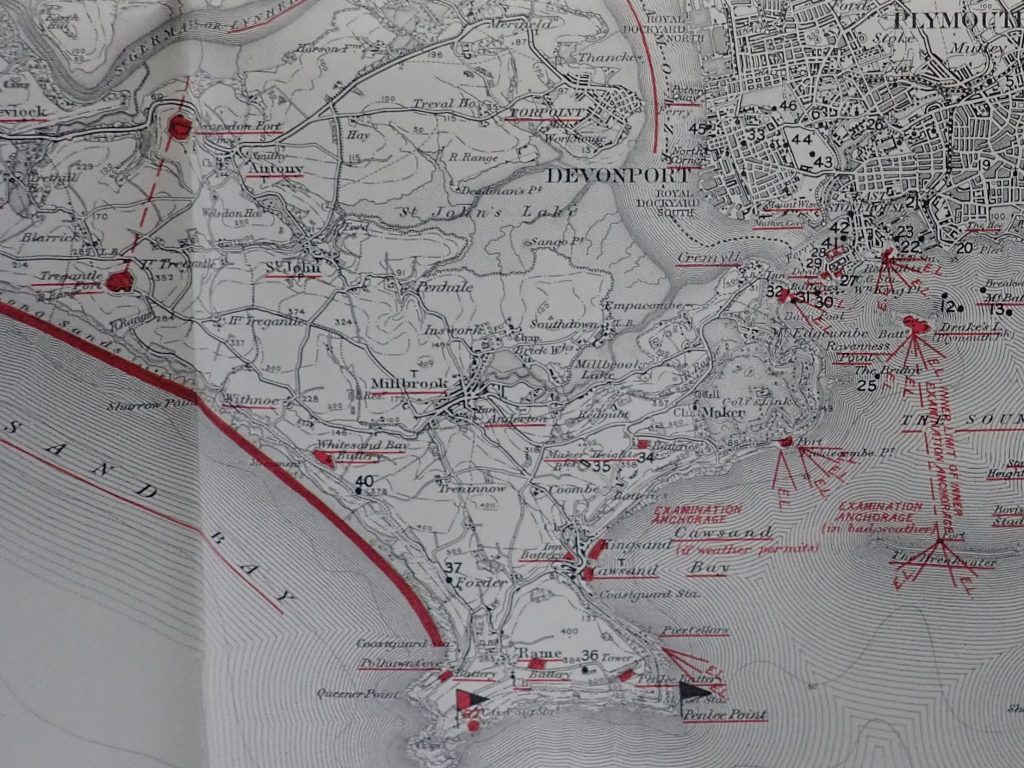
The Western Section took over Northern Section at the River Lynher and ran from there to the sea in the Tregantle area. The wartime HQ was based at Maker Barracks. It included the Fire Commands (these in turn commanded a number of gun batteries) at Knatterbury, Middle Barton and Picklecombe. Their key points included Fort Scraesdon, Fort Tregantle and Fort Tregantle. The Batteries at Whitsand Bay, Polhawn, Rame Church, Penlee, Cawsand, the Hawkins Battery, Piers Cellars, the Port War Signal Station at Rame Head and the Trennlhow, Knattersbury and Middle Barton Position Finding Cells which determined range and direction for the guns.
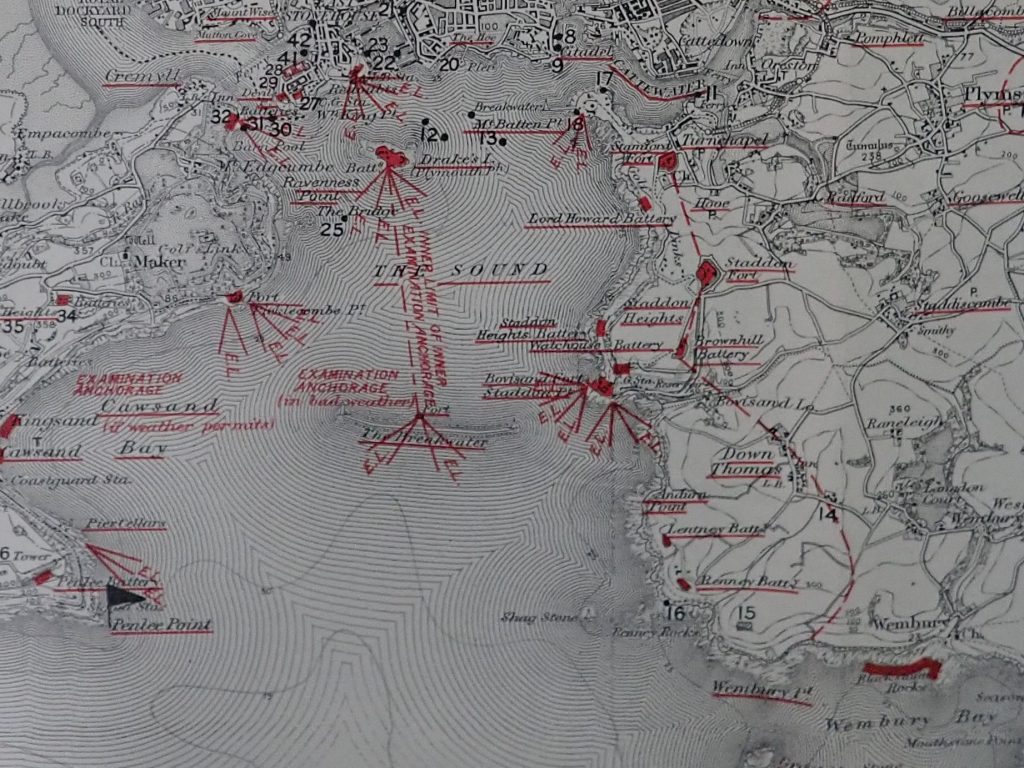
Drake’s Island was part of the Eastern Section. This covered the other side of the Northern Section from the Cattewater to Wembury Point. The wartime HQ was at Stadden Fort and included the Fire Commands on Drake’s Island and at Wembury. Amongst the key points were Drake’s Island, Mount Batten, Fort Bovisand, Fort Stamford, Stadden Fort and the Breakwater Fort, The Batteries included Devils Point Bty, Lentney Bty, Watchhouse Bty, Eastern and Western Kings Bty’s, Garden Bty (at Mt Edgecomb). Renney Bty, Lord Howard Bty and the Wembury Position Finding Cells.
The reinforcement and mobilisation of the extra forces for the defences had a couple of phases starting with the Precautionary Period. This was deemed a period of increased tension which could lead to war and would be started by a cyphered or encrypted telegram informing the Commanders to adopt precautionary measures. The concern was a pre-emptive before a declaration of war so this phase would include the deployment of the available regular troops to key points. This would be followed by the order to Mobilise. This was the authority for Regular and Territorial Forces to move to their place of mobilisation. This would normally be a barracks for a Unit and individuals to be issued their wartime holdings of equipment and supplies so different to their actual wartime station. Following this would be a telegram placing coast defences on a war footing in accordance with the Defence Scheme. This would see troops begin to deploy to their wartime stations and any additional defences and temporary buildings, additional barrack huts for example, being constructed including those on private land. Because of the time it took back then to mobilise and deploy units the Defence Scheme uses two time frames from the issue of the Mobilise telegram which are the first 5 days and then plus 5 days.
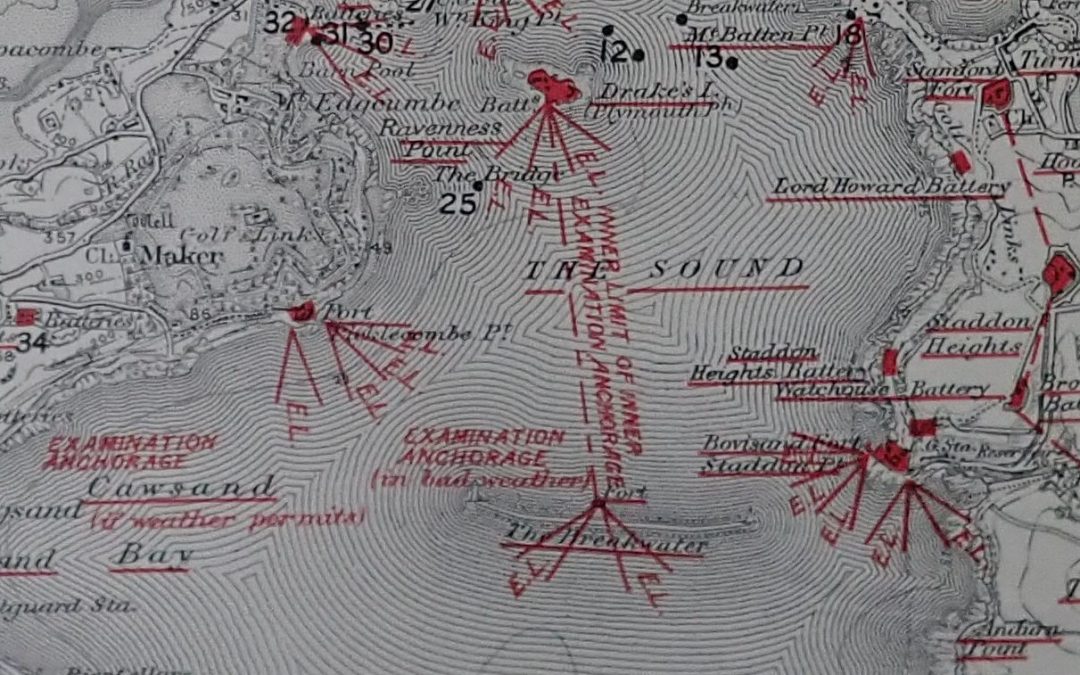
The level of manning and guns was assessed as being capable of repelling any attack from the sea or any landing and subsequent attack by a force of up to 5000 enemy troops. Any landing greater than 5000 troops was expected to be contained for 5 days until reinforcements could arrive to drive them off. The main threats were seen as attacks from Battleships or Armoured Cruisers in the precautionary period to destroy parts of the Fleet at anchor. Once defences were reinforced during mobilisation the threat was assessed to be from boom smashers and fast destroyers or torpedo boats to destroy any ships in the Sound or by blockers (ships deliberately sunk) and minelayers to stop the fleet getting out of the port. Attacks by torpedo boats were thought most likely in thick (bad) weather or at night helping with the element of surprise although making navigation more difficult. Part of the naval plan was to disperse the various naval squadrons along the coast at sea as a defensive measure during the precautionary stage. Any ships anchoring in the Sound would be behind the boom which stretched across from the Island to the Rame Peninsular and included dolphins or sharks teeth on the Drake’s Island side. Landing attacks were assessed to be most likely small raids by boat crews to destroy key installations rather than large scale landings.

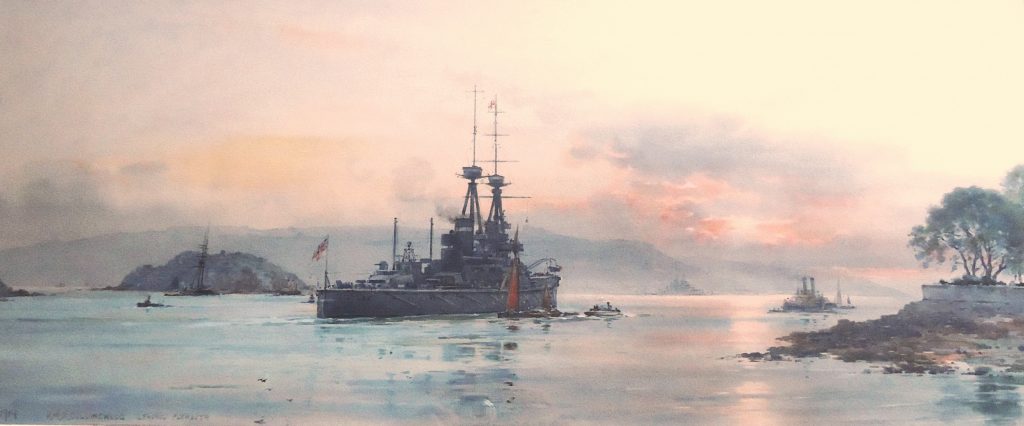
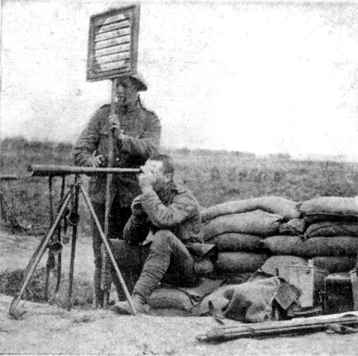
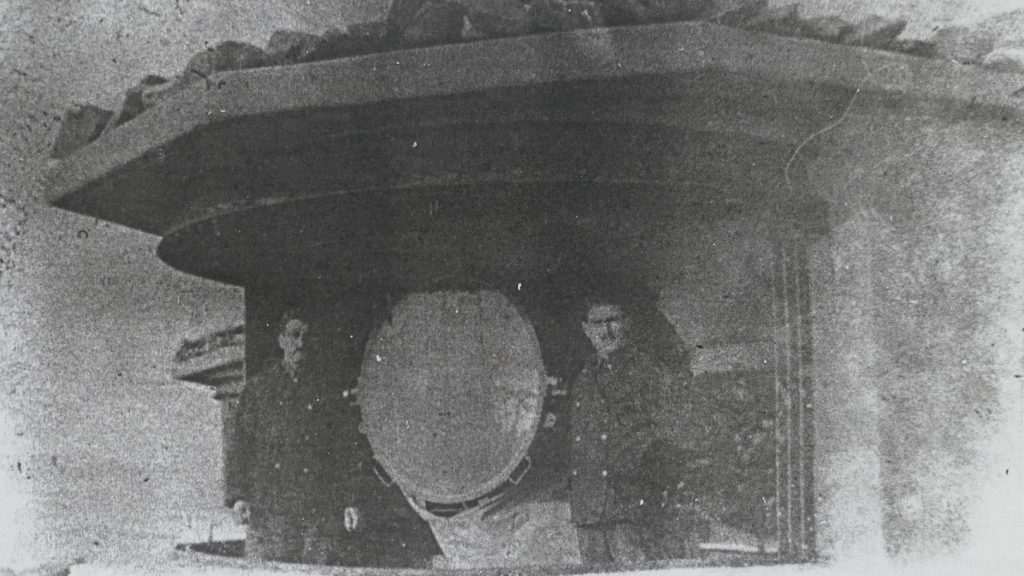
Part of the precautions were an examination anchorage, vessel and guns to identify and if needed search unidentified vessels approaching the Sound. One of the examination guns scheduled to be on the Island. The Merchant ships could only use the western entrance of the Breakwater. The Examination Service was to determine if the ships were friendly or hostile. The Examination Anchorage was between the Island and Breakwater to the west of a line running from the searchlights on the Island to the Breakwater Fort. Initially the Examination Steamer with Naval Officers on board would identify a vessel and if necessary direct it to the anchorage to be searched. The Examination Guns (the one on the Island was not only one in the Sound) was always to be manned and the gun ready for immediate action with plugged (used for warning shots) and service ammunition with two signallers posted as look outs. Officers were to do a full handover including ammunition, communications, stores and equipment which would include signal lanterns, fog horns, semaphore flags, megaphones, night binoculars and a signalling telescope amongst other items. The Gun would usually fire on a signal from the examination vessel using fire plugged ammunition on any vessel whose intentions were unclear then open fire with service ammunition if it failed to stop. The gun would immediately fire on any vessel recognised as hostile and could do so without a prior signal from the examination vessel.
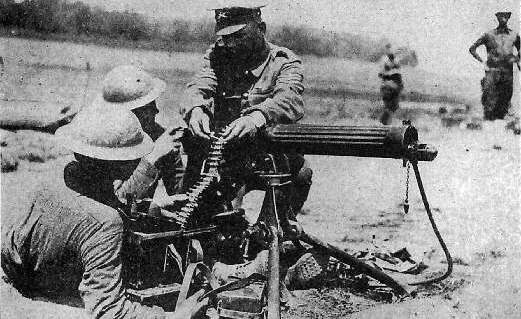
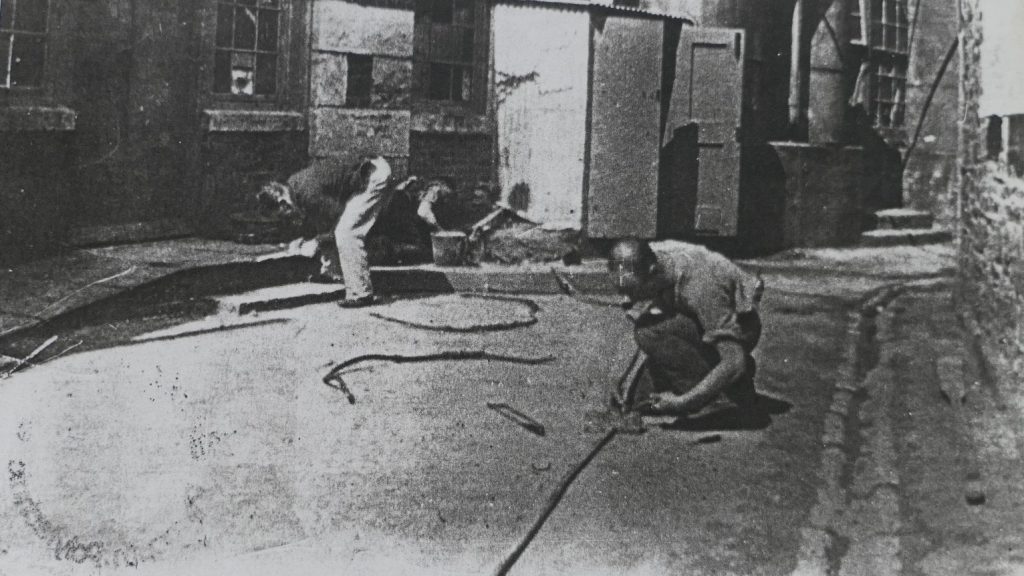
During the precautionary phase the Island was due to have an infantry detachment of 1 Officer and 22 men to protect against raids against the guns or electric lights (searchlights). They had 4 maxim machine guns allotted to them to assist with the task, each gun being operated by 2 men. The Island was scaled for 12 guns, three 12 pounder Quick Fire (QF) guns at the Western Battery and another three at the Eastern Battery with three 6 inch Breech Loading (BL) guns on the Centre Battery all of which were on the Island in 1911. The Island had three searchlights on the Island all positioned slightly below the Casemates on the foreshore just above the high water mark which were fed by 25hp oil generators. The London Electrical Engineers, a territorial force were to send a detachment to the Island to operate the searchlights during the precautionary phase until relieved later during the mobilisation by the Devonshire (Fortress) RE electric companies.
The manning for the whole of Eastern Section during the Precautionary period was 29 Officers and 790 men out of a total for the Plymouth area of 116 officers and 3,315 men including the reserves. This would rise to 91 Officers and 2,247 men out of 364 officers and 7,848 men in the first 5 days of mobilisation and 149 officers and 4021 men out of 540 officers and 13.255 men once mobilisation was complete. Drake’s Island would be heavily manned from the start with 9 officers and 220 men due to be deployed in the precautionary period due having a Fire Command and to the examination gun which needed to be manned from the precautionary period. This would only rise to 11 officers and 235 men within the first 5 days of mobilisation with no further reinforcements required to complete the final mobilisation. The final numbers on the Island by unit was listed as
District Staff 1 officer and 2 men
Citadel Company Royal Garrison Artillery 4 officers and 168 men
Royal Garrison Artillery Devonshire Company 2 officers and 8 men
30 Company Royal Engineers 1 officer and 21 men
Devonshire Light Company Royal Engineers 1 officer and 11 men (to replace the London Electrical Engineers deployed during the precautionary period)
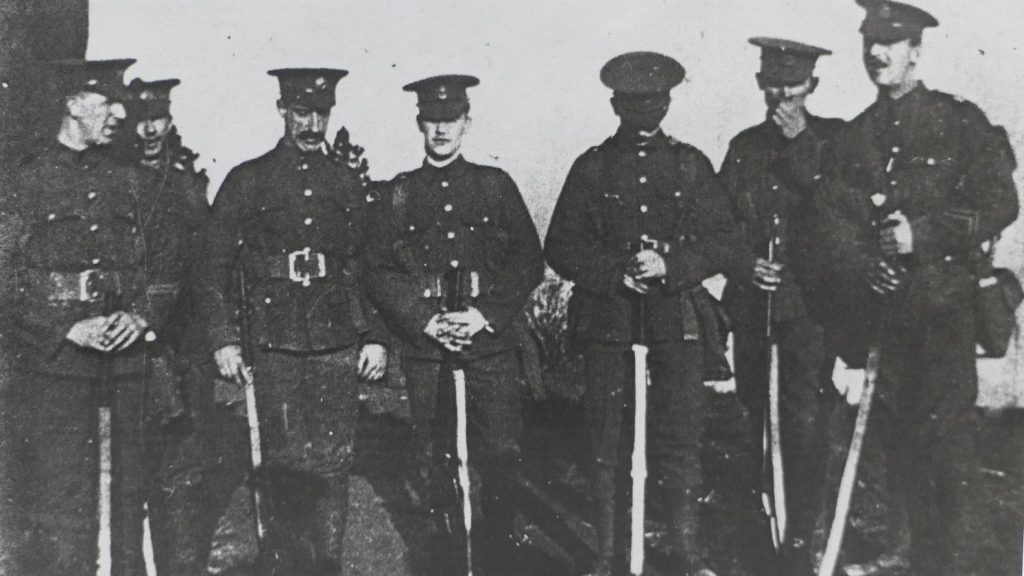
3rd Battalion South Staffordshire Regiment 1 officer and 22 men (to replace the 4th Battalion Wiltshire Regiment deployed during the precautionary period)
Royal Army Medical Corps 1 officer (surgeon) and 3 men.
The Fire Commander had one Battery and six Gun Group Commanders under his command on the Island as well as having the Lord Howard Battery as part of his command. Apart from those crewing the guns themselves, the 6 inch gun had a 9 man gun crew when at full complement and the 12 Pounder QF had a 5 man crew, the Artillery manning also included a Master Gunner, four Direction Range Finding specialists, six telephonists, six signallers, three artificers, thirty-eight Gunners working in ammunition supply, two storemen, seven orderlies plus some other support staff. Of the above, the Examination Gun which would be manned 24 hours a day would have three of the Gun Group Commanders, three orderlies, all six signallers and 15 gunners divided into three shifts.
The Royal Engineers manning was split into mechanics, electricians, engine drivers (or generator operators) plus some on general duties.
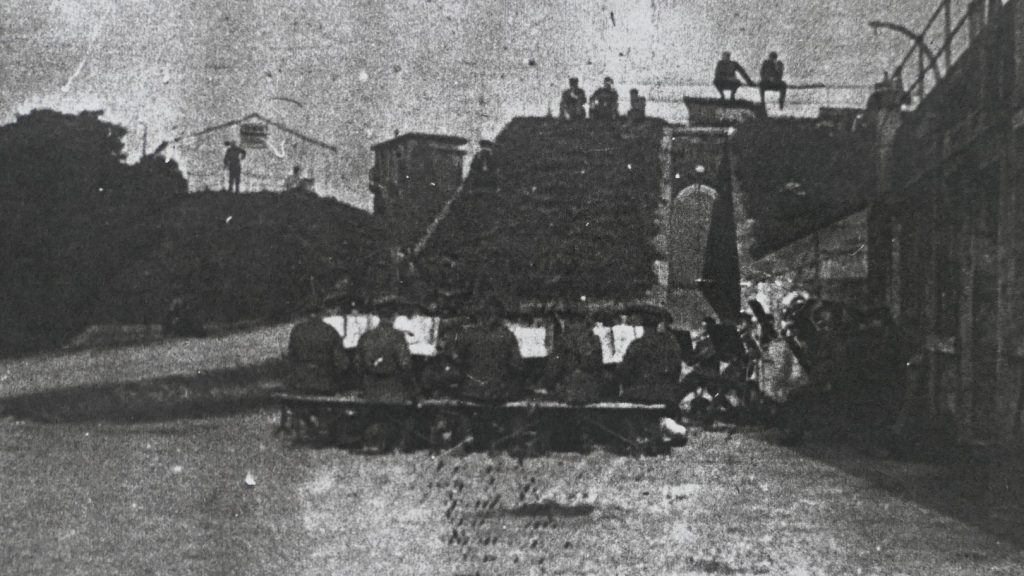
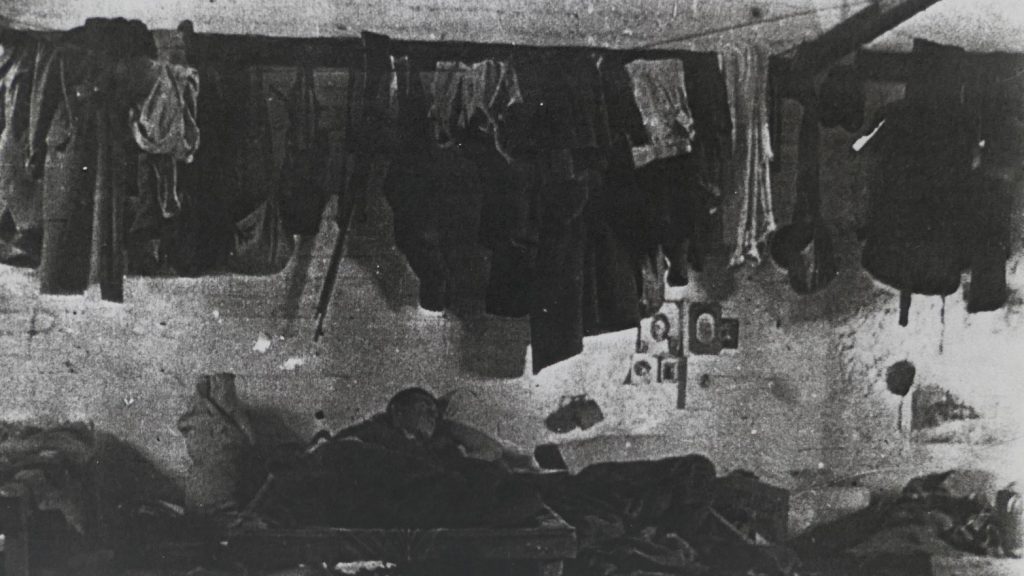
The existing buildings were deemed to be sufficient for housing the garrison during the precautionary phase with the officers and 81 men in the Barracks and one officer and 41 men in the casemates. By the end of the mobilisation phase there would be 110 in the Barracks, 105 in the casemates with the remainder in temporary huts. There were 2 phone lines for Artillery command and 1 phone line for the Engineers. Rations were due to be delivered by boat daily and the Island was to hold 7 days rations in case of bad weather. Looking at this part of the Drake’s Island element of the Scheme it does stand out that the Island can only be accessed by boat providing yet more evidence, the Fort Log from World War II says the same, that there is no tunnel between the mainland and the Island!!
In general this was the plan used on the outbreak of World War 1. Although it appears the timeline was adjusted and the precautionary period didn’t really happen, with everything starting with the declaration of war. Both the Wiltshires and London Electrical Engineers did deploy but at the outbreak of war rather than earlier and the South Staffs never appeared with the Wiltshires leaving the Island after a few months and not being replaced. This would be expected as no plan survives contact with either the enemy and reality. The Royal Navy blockade of the North Sea prevented the German Navy from coming out of the Baltic Sea and threatening Plymouth and Devonport so the threat to Plymouth and Devonport diminshed especialyy after the Battle of Jutland in 1916. Apart from the infantry detachment the manning for the Island generally remained in line with the Defence Scheme until the end of the war.
The next blog will look at the Island during World War II. A bit of an update from the previous World War Two blog as I now have the Fort Log from that period. Unfortunately the Fort Log for World War I was destroyed so I have nothing new for the course of that War.